
Co-Packing Pricing Explained: Quotes, Hidden Fees, and True Unit Cost
Co-packing quotes can look clean on page one, then the invoice shows extra line items you never planned for. That gap is what makes Co-Packing Pricing feel confusing, even for experienced brands.
Co-packing is when a third party packages (and sometimes assembles) your product into retail-ready units for you. In plain terms, Co-Packing Pricing means the full cost to get a finished, sellable unit out the door, not just the per-unit pack rate.
In this post, you’ll learn the most common ways co-packers charge (per unit, per hour, setup fees, and blended rates), plus the cost drivers that swing a quote fast, like run size, changeovers, packaging complexity, and who supplies materials. You’ll also see where “hidden” fees tend to show up, such as inbound receiving, storage, rework, rush charges, and freight related add-ons that can move with carrier increases.
Most important, you’ll learn how to compare bids using a total landed unit cost so you’re not picking the cheapest quote and paying more later. If you’re still weighing options, this quick guide on Co‑packing pricing vs private label costs can help you frame the decision.
To keep surprises to a minimum, the last part gives a simple checklist of questions to ask before you approve a PO, including what’s included, what triggers upcharges, and how changes get priced.
What Co-Packing Pricing Really Includes (Beyond “Cost Per Unit”)
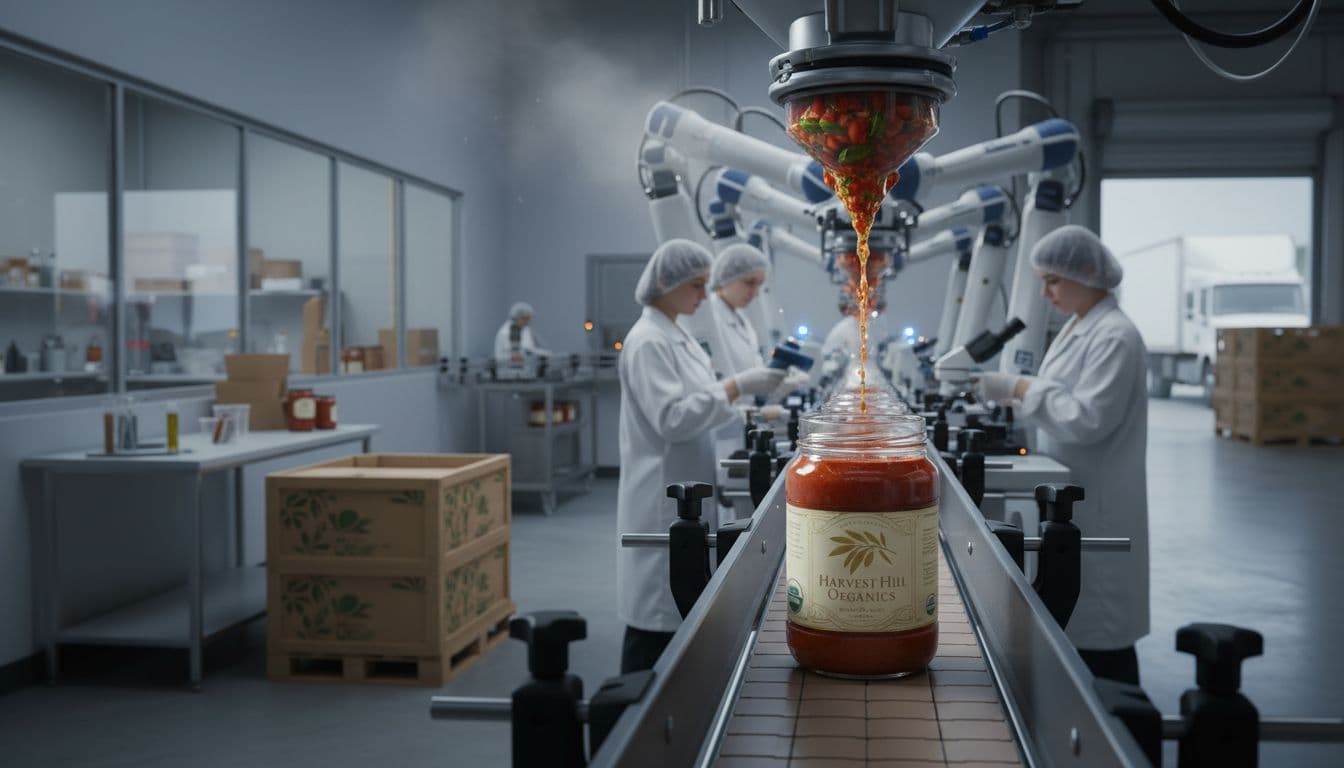
A co-packing quote is usually built from multiple pricing buckets, even if the first page only shows a “cost per unit.” That’s because the job is more than a single action. One facility might only pack and label product you already made, while another might also fill, blend, cook, or bottle before it ever hits a packaging line.
The key is scope. The same product can price very differently at two facilities based on equipment, speed, staffing model, and what services are included versus billed separately. If you want to compare quotes fairly, you need to know what’s inside each bucket, and what events trigger add-ons.
Direct costs you can see: labor, packaging materials, and line time
Most co-packing pricing starts with three visible building blocks. They show up in almost every quote, but they can vary a lot based on how your product is packed.
Labor is the people time required to do the work, from feeding the line to building cases and stacking pallets. Labor costs change fast when the process switches from automated to hands-on.
- Hand kitting (people placing items into cartons, adding inserts, building variety packs) usually costs more per unit because output depends on human speed and accuracy.
- Automated packing (a line that forms, fills, seals, labels, and cases at speed) can be cheaper per unit at volume, but may come with higher setup time and stricter specs.
Packaging materials are the physical components that become your sellable unit. Common examples include pouches, bottles, caps, labels, cartons, corrugate cases, shrink film, inserts, and tape. Small packaging decisions can swing cost more than brands expect:
- Pouches vs. cartons: a pouch might lower material and shipping weight, but require specific sealing equipment and may need a display carton later.
- Labels vs. pre-printed film: labels add a label application step and more changeovers, while pre-printed film can reduce labor but often requires higher minimum print runs and creates more scrap risk if the design changes.
Materials can be customer-supplied or co-packer-supplied, and the choice affects both pricing and risk.
- If you supply materials, you might control specs and pricing, but you also own the risk of late deliveries, shortages, or wrong components arriving.
- If the co-packer supplies materials, you may pay a markup, but you can reduce coordination work and shift some sourcing risk to the facility (you still need clear specs in writing).
Line time is how long your job occupies equipment and space. It’s the “clock” behind many rates, even when you get a per-unit price. If the line runs slowly due to tricky packaging, frequent jams, manual steps, or fragile product handling, your unit cost climbs because the facility produces fewer sellable units per hour.
A quick way to sanity-check any quote is to ask: What run speed did you assume (units per minute), and what’s your expected efficiency? If those numbers are optimistic, your invoice can drift upward.
Setup and changeovers: why short runs often cost more
Setup, changeover, and cleanup are the hidden time sinks that make short runs pricey. Think of it like turning over a hotel room: the guest only sees the room, not the work between check-out and the next check-in.
Here’s a simple scenario: you run SKU A in the morning, then switch to SKU B after lunch.
- Setup is getting the line ready for SKU A (loading film, dialing in seal temps, setting guides, staging components, verifying codes).
- Changeover is switching from SKU A to SKU B (new film or label roll, new lot code, new case pack, new weight target, new settings).
- Cleanup is clearing the line, removing leftovers, and doing any required sanitation (especially important for food, allergen, or fragrance products).
That work can take 30 minutes or it can take several hours. The catch is simple: when you only run 2,000 units, those hours get spread across fewer units. When you run 200,000 units, the same downtime barely moves the needle.
To avoid surprises, ask how changeovers are billed and what triggers extra charges. Common triggers include:
- New film or new label roll (and the time to thread, align, and verify it)
- Allergen cleanup or heightened sanitation steps
- New case pack (changing how many units per case, adding dividers, or changing pallet pattern)
- New lot code format or added traceability requirements
If a quote lists a low per-unit rate, confirm whether setup is included, capped, or billed as a separate fee. Also ask what happens if you add “just one more SKU.” That single addition can create another full changeover.
Storage, handling, and “time in the building” fees
A lot of co-packing pricing surprises come from what happens before and after the line runs. Invoices often include charges tied to how long your inventory sits in the facility, and how many times it gets touched.
Common fees you’ll see include:
- Inbound receiving: unloading, counting, and checking what arrives
- Pallet put-away: moving pallets into a storage location
- Monthly storage: “rent” for occupying pallet positions
- Pick/pack: pulling product or components for production, then packing finished goods for shipment
- Outbound staging: building loads, wrapping pallets, and staging for carriers
For a real-world reference point, standard pallet storage is often priced in the neighborhood of $20 to $25 per pallet per month (it can be lower or higher based on region, volume, and whether special handling is required). Some providers still quote storage around $12 to $20 per pallet per month, but rates have trended up with warehouse costs. Refrigerated or hazmat storage costs more.
The “storage clock” usually starts the day your pallets are received and ends when they ship out, not when you “want” them out. If your sales are slow, storage becomes a quiet tax that grows each month. The easiest fix is operational, not negotiational: keep inbound deliveries tight to the production schedule, and don’t ship in six months of packaging if you only need six weeks.
Quality, compliance, and rework costs that surprise brands
Quality and compliance are necessary, but they are not always included in the base rate. Many brands assume a co-packer’s standards automatically match their retailer’s requirements. Sometimes they do, sometimes they don’t, and the gap can cost money.
Common quality and compliance line items include:
- QA checks and documentation: inspection steps, checklists, and batch records
- Traceability: lot tracking for ingredients, packaging, and finished goods
- Lot coding and date coding: applying and verifying readable codes in the right location
- Metal detection or X-ray (where applicable): equipment time, testing, and logs
- Weight checks: scale checks, statistical sampling, and hold procedures
- Retailer requirements: label placement, scannability, case labeling, pallet labels, and photo verification
- Audits and certifications: time and cost to host audits, provide records, or meet program requirements
Then there’s rework, which is exactly what it sounds like: fixing something that should have been right the first time. Rework can include relabeling units, replacing a wrong label roll, re-coding product, re-packing crushed cases, or sorting mixed lots.
The big question is: who pays when rework happens? The answer depends on fault and on what the contract says. You’ll protect yourself by requesting quality standards in writing, including:
- Sampling plan (how many units are checked, and when)
- Acceptable defect rates (what counts as a defect, and what level triggers a stop)
- Hold and release rules (who can approve release if an issue is found)
- Rework approval and billing (who authorizes it, hourly rates, and how materials are handled)
If you want a practical way to put this into a contract, this breakdown of key elements of a contract packaging agreement can help you define responsibilities before the first run.
Common Co-Packer Pricing Models and When Each One Makes Sense

Co-Packers don’t all price work the same way, and that’s why two quotes can be almost impossible to compare at first glance. One supplier might quote a simple per-unit rate, another bills by the hour, and a third offers a day rate for a “project.” Each model can be fair, but each one hides costs in different places.
Your goal is to normalize every bid into an estimated all-in unit cost for a specific run size (for example, 10,000 units of SKU A with X packaging components). When you convert labor, setup, materials, and handling into one comparable number, the cheapest quote on page one stops being the loudest voice in the room.
Per-unit pricing: easy budgeting, but you must confirm what is included
Per-unit pricing is the most brand-friendly on paper. You get one number (like $0.42/unit) and can build clean forecasts. In many cases, that single rate bundles direct labor, basic consumables, and a slice of standard overhead (supervision, utilities, routine wear and tear).
The catch is that “per unit” often means “per unit for standard work under standard assumptions.” Storage, freight handling, special packaging, and changeovers can still sit outside the rate, waiting as separate line items.
To avoid a quote that looks simple but invoices messy, ask for a written list of what the per-unit rate includes. Here’s a short checklist worth confirming upfront:
- Materials: Which packaging items are included (if any), and whether there’s a markup on co-packer-supplied components.
- Labor: What tasks are covered (packing, case building, labeling, pallet wrap).
- Setup: Whether line setup is included, and if it’s capped after a certain time.
- QA: What checks are included (in-process checks, code checks, basic documentation).
- Scrap allowance: What spoilage or scrap percentage is built into the price, and what happens above that.
- Secondary packaging: Cases, dividers, inserts, shrink-bundles, display builds, and whether those steps are included or billed extra.
- Palletizing: Pallet build, stretch wrap, labels, and whether pallet patterns are treated as “standard” or “custom.”
Per-unit pricing makes the most sense when your process is repeatable and stable (same packaging, same case pack, predictable changeovers). It can also be a great fit once you’re past early-stage testing and running consistent volumes.
Hourly or line-time pricing: flexible for complex jobs, harder to predict
Hourly pricing (labor hours, machine hours, or “line time”) is common when the work has moving parts. Think hand kitting, mixed-SKU bundles, finicky packaging, or anything where output depends heavily on real-time conditions.
This model is fair because the co-packer charges for the resources you actually use. It also puts a spotlight on the thing that drives your true cost: efficiency. If the line runs slower than planned, your cost per unit climbs even if the hourly rate stays the same.
When you’re quoted hourly, don’t stop at the rate. Ask the questions that let you translate time into units:
- Expected line speed: What throughput are they assuming (units per hour), and what efficiency percentage backs it up?
- Staffing assumptions: How many people are on the line, and what roles are included (operators, packers, QA support, forklift)?
- Downtime rules: If the job runs long, what counts as billable time?
- Issue responsibility: What happens if delays come from problems not caused by your brand (equipment issues, staffing gaps, scheduling interruptions)?
A practical way to protect your budget is to request one of these, when possible:
- A not-to-exceed cap for the run (a hard ceiling unless you approve more time).
- A priced range tied to measurable throughput (for example, pricing assumes 2,500 to 3,000 units per hour, with clear rules if it falls outside that band).
Hourly pricing makes sense when you have real complexity, variable SKUs, or early runs where nobody can honestly promise a clean per-unit rate yet. It’s also a good model when you trust the co-packer’s reporting and want transparency into where time goes. For a broader view on evaluating partners and what to ask before committing, see How to choose the right co‑packer.
Day rate or project pricing: simple on paper, watch the scope closely
Day rates and flat project fees usually show up for special situations: heavy handwork, store displays, rework, relabeling, launch crunches, or anything with uncertain timing. It’s the “we’ll dedicate a crew to you for the day” model.
It sounds simple, and it can be, as long as the scope is locked. The risk is scope creep, which is just a plain-English way of saying the job quietly grows while the price stays vague. One extra insert becomes two, then the case pack changes, then there’s a last-minute label swap. The work expands, the day runs long, and the invoice follows.
Before you approve a day rate, define the boundaries in writing so both sides are talking about the same “day” and the same output. At minimum, get clarity on:
- Start/stop times: What hours count as the day, and how overtime is billed.
- Breaks: Whether breaks are included or billed, and how they’re handled.
- Staffing: Crew size and roles included (and whether QA or forklift time is part of it).
- Materials responsibility: Who supplies packaging, tape, labels, pallets, and rework materials.
- Maximum SKUs per day: How many SKUs or changeovers are included before add-on charges apply.
- If it finishes early: Whether you’re billed a full day anyway (common), and what “done” means.
- If it runs over: The hourly rate after the day rate, and whether overages require approval.
Day rate pricing makes the most sense when the work is hard to time, but easy to define by scope. If it’s hard to define either way, push for a clear unit-cost estimate for your run size, even if it’s a range. That’s how you keep Co-Packing Pricing comparable across vendors, even when their billing styles look nothing alike.
The Biggest Cost Drivers That Change Your Quote Fast
With Co-Packing Pricing, small decisions can swing your quote fast. It usually isn’t because a co-packer is being “mysterious”, it’s because a few inputs change the math: how long the line runs, how many steps happen per unit, who controls materials, and how much waste gets baked into the plan.
If you want lower true unit cost, focus on the levers you can control before you lock packaging and place a PO.
Order volume, minimums, and run length (the scale discount effect)
Most co-packers have a minimum order quantity (MOQ), plus a practical minimum run time (for example, “we need at least half a shift to schedule this job”). Even if you only need a small batch, the line still needs setup, checks, and cleanup.
The big idea is simple: setup time is mostly fixed, and fixed time gets cheaper per unit as volume goes up. Longer runs also reduce the number of changeovers, which means less downtime.
Here’s a round-number example to show the scale effect:
- Setup and changeover time cost (labor + equipment time): $2,000 per run
- Running cost (labor while producing): $0.20 per unit
| Run size | Setup cost per unit | Run cost per unit | Estimated total per unit |
|---|---|---|---|
| 5,000 units | $2,000 ÷ 5,000 = $0.40 | $0.20 | $0.60 |
| 20,000 units | $2,000 ÷ 20,000 = $0.10 | $0.20 | $0.30 |
| 50,000 units | $2,000 ÷ 50,000 = $0.04 | $0.20 | $0.24 |
Same line, same product, same setup, but a very different unit cost.
A few practical ways to use this:
- Combine demand into fewer, longer runs when you can (monthly instead of weekly).
- Keep early production to fewer SKUs so you’re not paying repeated setup.
- Ask for pricing at multiple volumes (10k, 25k, 50k) so you can see where the curve flattens.
Packaging complexity: components, case packs, and kitting steps
Every added packaging component usually adds more touches. A touch is one step a person or machine must do, like place an insert, apply a sticker, or shrink a multi-pack.
A simple single-SKU pack might look like: fill, cap, label, case pack, pallet wrap. Add a leaflet and a shrink band, and you just added two more touches (plus more chances for jams, misfeeds, and rework).
Common “touch adders” that raise Co-Packing Pricing quickly:
- Inserts and leaflets (pick, place, verify orientation)
- Stickers (apply, smooth, check placement, replace misprints)
- Shrink bands or overwrap (apply, heat tunnel time, cooling time)
- Multi-packs and bundles (collate units, wrap, label, pack out)
- Retail-ready displays (build the display, load product, close, label, often handwork)
- Kitting steps (counting items, matching lots, building variety packs)
Case pack rules matter here, too. A case pack is how many retail units go into a shipping case (like 12 per case). If you use odd case counts, mixed packs, or a custom pallet pattern, the line slows down and mistakes rise. Even “small” changes, like switching from 12 to 10 per case, can affect how fast a team can pack and stack.
Tips to simplify early (and often save real money):
- Start with fewer components; add the “nice-to-haves” later.
- Use standard case counts (and keep them consistent across SKUs).
- Avoid custom mixed packs until volume is stable and demand is proven.
- If you need secondary packaging or bundling, keep the method consistent; outsourcing secondary packaging advantages can help you think through what belongs on the line versus off-line handwork.
Materials responsibility: brand-supplied vs. co-packer-supplied (and the real tradeoffs)
Who supplies packaging materials can change your quote and your stress level.
Brand-supplied materials often look cheaper on paper because you avoid material markup and you can shop printers and suppliers yourself. The tradeoff is risk:
- Late deliveries can idle the line, triggering reschedules or rush costs.
- Wrong specs (film thickness, label core size, adhesive type) can slow the run or cause jams.
- Damaged pallets, bad counts, or mixed lots can create extra receiving, sorting, and downtime.
Co-packer-supplied materials can cost more per item, but it can reduce surprises:
- One party owns sourcing, inbound timing, and spec matching.
- The co-packer may already know which materials run well on their equipment.
- Fewer handoffs often means fewer “it arrived, but it’s wrong” problems.
To keep it clean either way, get these policies in writing:
- Who owns scrap: If labels are misaligned due to a spec issue, who pays for the wasted rolls?
- Leftover materials: Are partial cases returned, stored (and billed), or disposed?
- Substitution rules: If a component goes out of stock, who can approve alternates, and how fast? Require approval before anything changes, even if it seems minor.
If you’re still selecting a partner, this guide on choosing the right co-packing partner can help you pressure-test how they handle sourcing, specs, and accountability.
Waste and yield loss: the hidden math in every unit cost
Waste is always part of packaging, but the assumptions behind it are where unit cost gets slippery.
Quick definitions:
- Scrap: Packaging materials wasted during setup or due to defects (bad labels, wrinkled film, misprints).
- Spoilage: Finished units that can’t be sold (wrong code, bad seal, damaged product).
- Yield loss: The gap between what you planned to make and what you can actually ship as sellable units.
Even a small waste percent changes your true cost per sellable unit. If you plan for 10,000 units but you have 3% yield loss, you only ship 9,700 sellable units. You still paid for the labor and materials used to make all 10,000 attempts.
A simple way to feel the impact:
- If your all-in run cost is $3,000 and you ship 10,000 units, that’s $0.30/unit.
- If you ship 9,700 units after waste, it becomes $3,000 ÷ 9,700 = $0.309/unit.
- That seems small, until you scale it across bigger runs, more SKUs, and more components (and until waste hits 6% instead of 3%).
What to ask every co-packer before you sign off on a quote:
- What waste assumptions are included (setup scrap, in-run defects, coding rejects)?
- What happens if actual waste is higher than planned; do you pay extra labor, extra materials, or both?
- How do they track and report scrap, and will you get a post-run summary?
You can reduce waste by tightening specs and stop points. Clear, written limits prevent “we kept running and hoped it would improve” problems:
- Packaging tolerance (label placement, film registration, carton fit)
- Seal standards (acceptable wrinkles, seal width, leak rules)
- Coding rules (location, font size, readability, reject rate)
- Quality limits (what triggers a line stop, who approves restart)
- Rework rules (who authorizes it, how it’s billed, what happens to questionable units)
Waste is normal. Unclear waste rules are what turn normal into expensive.
How to Compare Co-Packer Quotes and Negotiate Without Getting Burned
When you’re staring at three co-packer bids that all “look” reasonable, it’s easy to pick the lowest number and move on. That’s how brands get burned. The fix is simple: control the scope, normalize the math, then negotiate the terms that create surprise charges. This is the action plan that makes Co-Packing Pricing comparable and predictable.
Build an apples-to-apples quote request (so pricing is actually comparable)
A quote is only as good as the request behind it. If each co-packer fills in blanks with their own assumptions, you’re not comparing pricing, you’re comparing guesses. Treat your RFQ like a blueprint, not a casual email.
Include these RFQ basics so every bidder prices the same job:
- Product description: what it is, what arrives at the facility (bulk product, finished units, components), and any handling notes (fragile, temperature-sensitive, hazmat).
- Packaging specs and component list: every item in the build, including sizes, materials, and print details. Call out critical-to-function specs (label core size, adhesive type, film gauge, carton grade).
- What the co-packer must supply vs what you supply: list it clearly. Include approved alternates and who can authorize substitutions.
- Run size and number of runs: quote by batch (10k, 25k, 50k) and tell them if you plan recurring runs.
- Number of SKUs and changeover expectations: how many SKUs per run day, and what varies (labels, flavors, case packs).
- Forecast: realistic volume by month or quarter so they can price staffing and scheduling honestly.
- Required certifications and retailer rules: any audit requirements, code formats, labeling rules, or channel compliance.
- Target ship dates: requested start date, ship window, and penalties on your side (retailer fines, launch deadlines).
- Labeling needs: unit labels, case labels, pallet labels, barcodes (UPC, GTIN-14), lot and date codes.
- Case pack and pallet pattern: units per case, case dimensions, pallet configuration, max pallet height, slip sheets, corner boards.
- Inbound and outbound plan: where materials ship from, where finished goods ship to, and whether you need pick/pack.
If you have them, attach photos, samples, and dielines (or at least marked-up drawings). If you need a clean checklist for gathering the right inputs, use this guide to request a contract packaging quote.
Calculate true unit cost: a simple formula for “all-in” Co-Packing Pricing
Here’s the simplest way to normalize bids into one comparable number:
True unit cost = (base packing charges + setup/changeovers allocated per unit + packaging materials + expected scrap + storage/handling + QA/compliance + freight and accessorials) ÷ sellable units shipped
In plain terms, take every cost you’ll likely pay, then divide by the units you can actually sell.
To keep it practical, build your spreadsheet with these buckets:
- Base pack fee: per unit, per hour, or per shift.
- Setup and changeovers: spread across units (don’t treat as “one-time” if you run many SKUs).
- Packaging materials: include markup rules if the co-packer buys them.
- Expected scrap/waste: plan a percentage for startup scrap and in-run defects.
- Storage and handling: receiving, put-away, picks to line, pallet build, outbound staging.
- QA and compliance: inspections, documentation, holds, retailer photo requirements, audit support.
- Freight and accessorials: drayage, liftgate, appointment fees, fuel, detention, redelivery.
Run scenarios for small, medium, and large production runs, because setup dilution changes everything. Also run a “bad month” case: a two-week shipping delay that triggers storage, plus a rework event that needs approval and labor. If the quote collapses under worst-case assumptions, it’s not a safe quote.
Questions to ask before signing: rate cards, changeover rules, and what triggers extra fees
Before you sign a PO or agreement, ask these questions and get the answers in writing:
- How are changeovers billed? Flat fee or hourly, and what counts as a changeover?
- What is the minimum charge per run? Minimum hours, minimum units, or a per-shift floor?
- When does storage start? Day of receipt, after a free window, or after production?
- What are receiving fees? Per pallet, per PO, per SKU, or per hour for unload and count?
- What is the rework approval process? Who approves, how fast, and what rates apply?
- What are payment terms? Deposit, net terms, and any finance charges.
- Is there a rush fee? What triggers it, and what’s the percent or hourly premium?
- How are materials marked up? Pass-through, cost-plus, or tiered pricing?
- What line speed assumption is in the quote? Units per minute and expected efficiency.
- How are schedule changes handled? Reschedule fees, cancellation windows, and who pays if materials arrive late.
Attach these written answers to the agreement as an exhibit so they can’t “drift” later.
Smart ways to negotiate: reduce risk, not just price
Price matters, but scope control is what protects you. Use terms that lower the chance of surprise invoices while keeping the co-packer whole.
Practical negotiation moves that usually work:
- Tiered pricing at volume levels: lock rates at 10k, 25k, 50k, and define how often rates reset.
- Agreed scrap allowance: set a normal scrap percent, then define what happens above it (and how scrap is measured).
- Capped storage for a defined window: for example, a free or capped storage period tied to your ship plan.
- Bundled setup for a multi-run commitment: reduced setup if you commit to two or three runs, or a quarterly schedule.
- Shared tooling cost: split one-time tooling with an ownership clause (who keeps it if you leave).
- Clearer specs to avoid rework: define acceptance standards for label placement, coding, seals, and case quality.
- Performance targets tied to throughput: align on run-speed assumptions and what happens if throughput falls short due to controllable factors.
A cheap quote with high add-on fees is like a low airfare with surprise baggage charges. In Co-Packing Pricing, the “best” bid is the one that stays stable when real life shows up. If you’re still comparing service scope between providers, the overview of different types of contract packaging services can help you spot when two quotes are priced for different work.
Conclusion
Co-Packing Pricing works best when you treat it like a system, not a single per-unit number. The quote is the starting point, the real cost comes from how labor, line time, materials, and handling stack together once the job hits the floor.
The biggest swings usually come from setup and changeovers, packaging complexity (extra touches add time), run length, storage and handling fees, and waste that reduces sellable units. If you want clean comparisons, ask for an itemized quote, then convert every bid into an all-in unit cost that includes those drivers. Get the assumptions in writing, run size, line speed, scrap allowance, storage start dates, and what triggers add-ons, so invoices stay predictable.
If you need help pressure-testing scope and services before you send an RFQ, this comprehensive guide to co‑packing services is a solid next read.
Thanks for reading. Talk with a co-packer early in product and packaging design, it’s one of the easiest ways to avoid expensive packaging choices that are hard to unwind later.